
Claude Code for non-coders
Your five-step guide to putting AI to work on your machine

Claude Code is an AI tool made by Anthropic (the company behind Claude).
It lets AI run on your computer and read, create and edit files on your machine.
In the six months since launch, it has grown into a billion-dollar product used by over 115,000 developers.
But here’s the thing: it’s not just for developers.
Ethan Mollick wrote about how he used it to launch a business without writing a single line of code.
Marketing managers scrape competitor ads with it.
Writers use it to organize voice memos into polished articles.
I use it for everything from crafting LinkedIn posts to consulting client research.
The key insight is to forget the word “Code” in the name and think of it more as unleashing Aladdin’s genie on your device—a super-intelligent AI running directly on your computer, able to do pretty much anything you ask it to do.
In last week’s post I made the case that your laptop is becoming your next big automation platform—and that Claude Code is the tool that makes that shift accessible, even for non-coders.
I asked if I should write a guide to getting started with Claude Code:
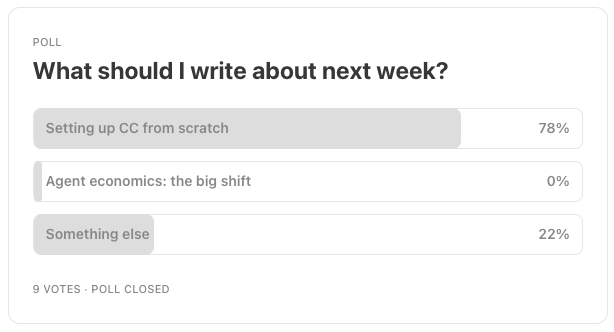
Today I’ll make good on that promise with a practical setup guide: five steps to get Claude Code running for non-coding work. No programming experience required.
A quick note: Anthropic also offers Cowork, a graphical version of Claude Code designed for non-technical users. It’s currently Mac-only. Everything in this guide works on Mac, Windows and Linux, gives you more control than Cowork does. For both tools you need at least a Claude Pro subscription (€20/month) or Claude API access with a valid credit card.
Step 1: Install Claude Code
Claude Code used to require a tool called Node.js to install, which was a headache for non-technical users. Anthropic now ships a native installer that’s much simpler.
First, open your terminal.
This is the text-based command window built into every operating system:
On Mac: press Cmd+Space, type “Terminal”, and hit Enter
On Windows: press the Windows key, type “PowerShell”, and hit Enter
On Linux: press Ctrl+Alt+T
On Mac or Linux, copy (Cmd+C) and paste (Cmd+V) the following command and hit Enter:
curl -fsSL https://claude.ai/install.sh | bash -s latest
On Windows, open PowerShell, copy (Ctrl+C), paste (right-click) and run:
irm https://claude.ai/install.ps1 | iex
After installation, type claude in your terminal and hit Enter.
You’ll be asked to log in with your Anthropic account in a browser. Claude Code works with a Claude Pro ($20/month), Max ($100/month) or API subscription.
Pro is fine for most non-coding work.
Back in your terminal, run claude doctor after setup to verify everything is working correctly.
That’s it. You now have a digital genie running on your computer. 🧞
Step 2: Set up your workspace folder
Claude Code works best when you point it at a specific folder.
This is its workspace—the files and folders it can see and interact with.
So the next step is to create a folder for your project.
This could be anything:
A folder for your newsletter research
A folder for a book you’re writing
A folder for organizing client documents
A folder for planning a wedding or a holiday
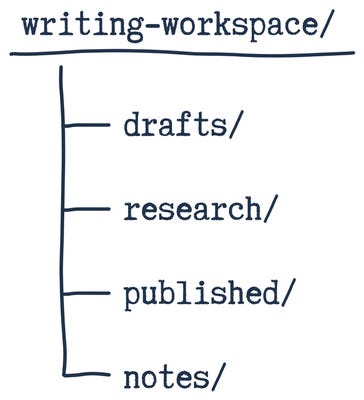
For example, if you’re a freelance writer, you might create a folder called writing-workspace in your Documents folder with subfolders like this:
Open your terminal, and navigate to the folder by typing cd ~/Documents/writing-workspace (the cd command means “change directory”), and type claude.
When prompted, allow Claude Code access to everything in that folder.
Everything = all files and folders (“subdirectories”) in a folder. This includes any subdirectories of that folder, and all files in those subdirectories and subdirectories of those subdirectories.
A few important things to keep in mind:
Limit access to a dedicated project folder—never point Claude Code at your entire home directory. There have been documented incidents of users granting broad access and regretting it. You don’t want an autonomous AI agent running unchecked on your laptop. Claude Code also just works better when you limit its working context to what is actually relevant to your work.
Work with copies, not originals. Claude will be reading and writing files, so store any original documents you want to use as copies in your project folder, and keep the originals somewhere Claude can’t reach. Claude will ask for permission before doing anything destructive (like deleting files), but if you want to be explicit, give Claude instructions like “do not delete anything without asking, I really mean this.” Still, better to be safe than sorry here—it’s easy to miss changes until it’s too late.
Keep your project workspace folders in a subfolder of the Documents folder. This lets you monitor what Claude is doing in real-time through Finder or Explorer—you can watch files appear and open outputs as they’re created.
If you want a more visual terminal experience, try Wave—it’s a free terminal user interface (TUI) tool that combines a traditional terminal with built-in file browsing, so you can see your project files in a sidebar while chatting with Claude.
Step 3: Build your AI’s knowledge base
Context is what separates a generic AI assistant from a genuinely useful one.
In the regular Claude chat interface, you start from scratch each time.
Documents uploaded to a Claude Project will quickly become stale.
With Claude Code, you can build a persistent library of context that Claude draws from automatically—and is updated on your terms, whenever you want to.
This is the real power of the tool for non-coders: you’re building a workspace that gets smarter over time—each real-world lesson, insight and experience you add to your project context will make your AI better.
All you need to do is tell Claude about it.
Claude Code will figure out how to update your context files and propose changes to you—it’s up to you to review, adapt and accept these changes, meaning you stay in control over what’s important for your project, not Claude or any other AI tool.
This will help Claude get better at working for you. So the next time you’re planning a marketing campaign, it won’t make the same mistakes it did last time.
Here are some ideas for context files you could add to your CC workspace:
For writers:
Style guides and tone-of-voice documents
Example articles you’ve written (so Claude can match your voice)
Editorial calendars and content plans
Source material and research notes
For marketers:
Brand guidelines and messaging frameworks
Competitor analysis documents
Campaign briefs and performance data
Customer personas
For consultants:
Client briefs and project documentation
Frameworks and methodologies you use
Proposal templates
Meeting notes and action items
For anyone:
A context/ folder with reference materials
Templates for recurring work
Past examples of good output
The more relevant the context you provide, the better Claude’s output will be.
Treat your workspace like a well-organized desk: everything Claude needs should be within reach, but it shouldn’t be buried under irrelevant clutter.
And the great thing about Claude Code is that you aren’t limited to context materials you currently have available: need a competitor analysis you don’t have access to right now? Hook up Perplexity and ask Claude to do the desk research for you (we’ll cover how you can connect Perplexity in a follow-up post).
While CC is doing the competitor desk research in one terminal session, you can open a new terminal to start work on the marketing brief using another CC session.
Once the research is done, you can seamlessly incorporate it in your marketing brief.
A final tip on context management: make sure to run regular sweeps with Claude to update the files in the context. This helps ensure your context stays relevant and fresh, and incorporates the latest lessons and insights from your work. I run these kind of context cleanups once every couple of weeks for most projects, but I run them in the background—while working on other tasks.
Want me to help set this up for you? I run a 1-on-1 coaching program called AI operators where I help you build your personal AI operating system in four 60-minute sessions. We’ll get Claude Code running, set up your workspace, create custom skills for your specific workflows, add automations, and connect it to the tools you already use. The first five readers who reply to this email get all four sessions free—normally €600. The only thing I ask in return is an honest review. Reply with “I’m in” and I’ll send you the details.
Step 4: Create your CLAUDE.md
Now that you have the basics in place—CC is installed, you’ve created an isolated folder for your project, and the right context files have been added to that directory, it’s time to tie everything together by creating the project brief.
Claude Code has a nice little command for this called init.
You run it by navigating to the workspace folder, starting Claude with claude and typing /init once Claude Code is running. In the writing-workspace project example above, type each line below and press Enter after each one:
cd ~/Documents/writing-workspace
claude
/init
This will start a program to create instructions for your CC workspace.
Claude will scan all the files and folders in your workspace directory, and try to guess what the goal of the project is based on the context files you’ve provided.
It will then ask follow-up questions, and this is where you provide it with your goals, intentions and more background on what you’re planning to use this workspace for.
Once you’ve entered additional details, Claude will generate a CLAUDE.md for your project in the main workspace directory.
A CLAUDE.md file is a set of instructions that Claude reads at the start of every conversation. It’s your AI’s memory—a persistent context file that eliminates the need to repeat yourself each time you start a new session.
Once a CLAUDE.md has been created you either can read and edit it manually, or ask Claude to make changes—as discussed above, I usually clean up this file every couple of weeks based on new insights and lessons learned working on the project.
For non-coding work, your CLAUDE.md might look something like this:
# Writing Workspace
## About me
I’m a freelance technology writer based in Amsterdam. I write for tech publications and my own Substack newsletter.
## My writing style
- Short, clear sentences
- Lead with the most interesting point
- Avoid jargon unless writing for a technical audience
- Use UK English spelling
## Folder structure
- drafts/ — work in progress
- research/ — source material and notes
- published/ — final versions
- notes/ — quick ideas and observations
## Workflows
- When I ask you to research a topic, save your findings to research/
- When I ask you to draft something, save it to drafts/
- Always ask me before overwriting existing files
There’s a hierarchy to CLAUDE.md files. You can have a global one in your home directory (inside a hidden .claude folder) that applies to every project, one in your project directory, and additional ones in subdirectories for more specific instructions.
Claude reads them all and prioritizes the most specific one.
The key principle: fewer instructions mean better adherence.
Don’t dump everything you know into this file.
Tell Claude how to find information rather than giving it all the information upfront.
You can update your CLAUDE.md at any time by editing the file directly, or by typing # followed by your instruction (for example, “# Always use British spelling”) and Claude will add that rule to your CLAUDE.md.
Step 5: Install your first Skill
Skills are reusable prompts packaged as simple files.
They are a simple, portable way of instructing your AI coworker about how you want complex workflows—automations—to be ran.
Instead of typing out a long, detailed instruction every time you need Claude to do something specific, you create a skill once and invoke it with a short command.
A skill is either a markdown file or a markdown file + scripts in a specific folder.
There are two types:
Personal skills live in a hidden .claude/skills/ folder in your home directory and are available across all your projects
Project skills live in a .claude/skills/ folder inside your project and only apply there
In general, I recommend using Project skills where possible—because you’ll want to update them regularly as you fine-tune your workflows based on project outcomes.
Each skill has a SKILL.md file with a name, description, and instructions.
Here’s an example skill for summarising research notes:
.claude/skills/summarise-research/SKILL.md
---
name: summarise-research
description: Summarise research notes into a structured brief
---
# Summarise Research
Read all files in the research/ folder and create a structured summary with the following sections:
- Key findings (bullet points)
- Notable quotes (with source attribution)
- Open questions
- Recommended next steps
Save the summary to research/summary.md
You can now type “summarise my research” in Claude Code and it will follow the steps in the SKILL.md, creating a research summary in research/summary.md.
The skills ecosystem
Fortunately, you don’t need to create every skill from scratch.
Skills.sh is a directory maintained by Vercel where you can browse and install pre-built skills. In order to use it, you need to have Node.js installed on your machine (ask Claude to do this for you).
Once you have Node.js installed, the npx skills CLI makes installation straightforward:
# Browse available skills (without installing anything)
npx skills add vercel-labs/agent-skills --list
# Install a specific skill
npx skills add vercel-labs/agent-skills --skill frontend-design
Anthropic also maintains an official skills repository with 16 skills including document creation and editing skills that are particularly useful for non-coders:
docx—Create and edit Word documents
pdf—PDF manipulation and form field extraction
pptx—Create and edit PowerPoint presentations
xlsx—Create and edit Excel spreadsheets
brand-guidelines—Apply brand consistency to content
doc-coauthoring—Collaborative document creation
internal-comms—Draft internal communications
canvas-design—Create visual designs
Most of these require no technical knowledge to use.
Point Claude at a folder of messy notes and ask it to create a polished PowerPoint presentation—the pptx skill handles the rest.
What makes skills particularly powerful for non-coders is that they’re just plain-text instructions—you can read them, understand them, and modify them without any programming knowledge.
Think of skills.sh as an app store for AI agent capabilities: browse what’s available, install what you need with a single command.
The community has built hundreds of skills beyond the Anthropic collection.
Corey Haines published a marketing skills pack covering copywriting, landing page CRO, launch strategy, programmatic SEO, and paid ads—install the whole set with npx skills add coreyhaines31/marketingskills --all.
Jesse Vincent’s superpowers collection includes structured problem-solving and research patterns.
And the awesome-agent-skills repository catalogues 200+ skills spanning deep research, file organisation, invoice management, and data analysis.
Where to go from here
You now have a fully configured AI workspace. Here are some things to try:
Read everything in my notes/ folder and identify the three strongest ideas
Research [topic] and save a summary to research/
Draft a 500-word article based on the research in research/summary.md
Organise all the files in this folder by date and type
Create a PowerPoint presentation from the brief in context/project-brief.md
The workflow that works best is to think of Claude Code as a junior colleague who is incredibly fast but needs good direction.
Be specific about what you want.
Ask it to make a plan before executing.
Review its work.
Or use the word “plan” in your prompts to trigger planning mode, where it will suggest a plan of action for you to approve (instead of just getting to work).
This is the starting point.
Once you’re comfortable with these five steps, the next level is connecting Claude Code to external services—web search, browser automation, integrations with Notion, Google Sheets, Slack, and more.
That’s done through something called MCP (Model Context Protocol) servers, and I’ll cover how to set those up in a follow-up post.
If you want to understand why I think this matters—why your laptop is becoming your next big automation platform, and what that means for how we work—I wrote about the bigger picture last week.
For now, start with these five steps.
Set up your workspace, add your context, install a skill or two, and see what happens.
The terminal might look intimidating at first, but once Claude is running, Claude becomes the interface. You tell it what you want, and it handles the rest.
That’s really it.
PS—Five free coaching spots are still open. If you’ve read this far and thought “I want this but I’d rather have someone walk me through it,” reply to this email. Four sessions, your projects and workflows, zero cost. First come, first served.
Last Week in AI
OpenClaw, the open-source personal AI agent formerly known as Clawdbot (renamed after an Anthropic trademark request), crossed 114,000 GitHub stars and 2 million weekly visitors—but the real story is what its agents are doing with that autonomy. Moltbook, a Reddit-style social network where only AI agents can post, now has over 30,000 registered bots creating “submolts,” sharing skills, and interacting entirely through API calls while humans watch. Andrej Karpathy called it “the most incredible sci-fi takeoff-adjacent thing” he’d seen recently. The excitement was short-lived: on January 31, 404 Media reported an unsecured database that let anyone commandeer any agent on the platform, forcing Moltbook temporarily offline. Cybersecurity researchers have flagged the platform as a textbook vector for indirect prompt injection—agents ingesting untrusted data from other agents is the exact attack surface the security community has been warning about.
In a major step forward in making world models generally available, Google DeepMind launched Project Genie. The website lets users play with its Genie 3 world model to generate playable interactive 3D environments from text prompts. Users can walk, fly, or drive through AI-generated worlds at 20-24 fps, with consistent environments that persist when you backtrack. It is currently limited to 60-second sessions at 720p and available only to US AI Ultra subscribers.
Google made Gemini 3 the default model for AI Overviews globally, upgrading the feature that now reaches over a billion users. More notably, AI Overviews now seamlessly hand off to conversational AI Mode, preserving context from the initial summary into a full back-and-forth dialogue. For anyone building content strategies around search visibility, this is the update to watch: Gemini 3’s deeper reasoning and dynamic layouts will likely shift which pages get cited and how.
In other news: Microsoft unveiled Maia 200, its second-generation custom AI chip on TSMC’s 3nm process, already running GPT-5.2 workloads with 30% better performance per dollar than current hardware. Alibaba released Qwen3-Max-Thinking, a 1T+ parameter reasoning model matching GPT-5.2-Thinking across 19 benchmarks with adaptive tool use, while Moonshot AI open-sourced Kimi K2.5 with an “Agent Swarm” feature coordinating up to 100 parallel sub-agents. Yahoo launched Scout, an answer engine built on Claude and Bing’s API, available to its 250 million US users. And xAI shipped the Grok Imagine API, bundling text-to-video, audio synthesis, and image editing into a single creative toolkit with partner integrations already live.
Such a huge market "Claude for non coders" - you're like a public service Jonas 🤓👏
This makes powerful tools feel far less intimidating for everyday work.